What is MAGIC Crypto?
MAGIC is the cryptocurrency used inside Treasure Dao's ecosystem. Treasure DAO built its own NFT marketplace on Arbitrum and is the breeding ground for many groundbreaking Free to Mint NFT projects like Bridgeworld, SmolBrains, and many more.
Where can I buy MAGIC crypto?
You can currently buy MAGIC crypto on Sushiswap's Arbitrum Version.
Why should you buy MAGIC crypto?
With the Treasure Dao's explosion in popularity in the NFT space, MAGIC is one of the biggest tokens you can get your hands on if you believe blockchain gaming is the future. Thanks to the huge success of SmolBrains, Treasure DAO has built a community like no other in the space, meaning every project that launches on the platform gets immediate exposure to this passionate community. There is a lot of information available for the MAGIC token and Treasure's ecosystem that you can read here: https://startwithmagic.com/ I won't go too deep on MAGIC on this article and will focus more on how to buy.
How to Buy MAGIC Crypto?
Step 1 – Register on Binance

Binance is one of the leading exchanges for crypto. We’ll need to register on Binance and use it to buy the Binance Token, known as BNB.
Now it’s the boring part where you need to fill out your information. Make sure to use your accurate information because Binance will ask you for verification of everything.
Step 2 – Buy USDT with Fiat Money and Trade it for ETH.
Now that all the boring verification part is done, you have to add a payment method. You can choose between a Bank Transfer or Credit/Debit card. Credit Card has higher fees, but you can make an instant purchase. Bank Transfer is cheaper, but you have to wait a couple of days for the money to arrive at Coinbase.
For this demonstration, I will be using the Credit Card payment method.
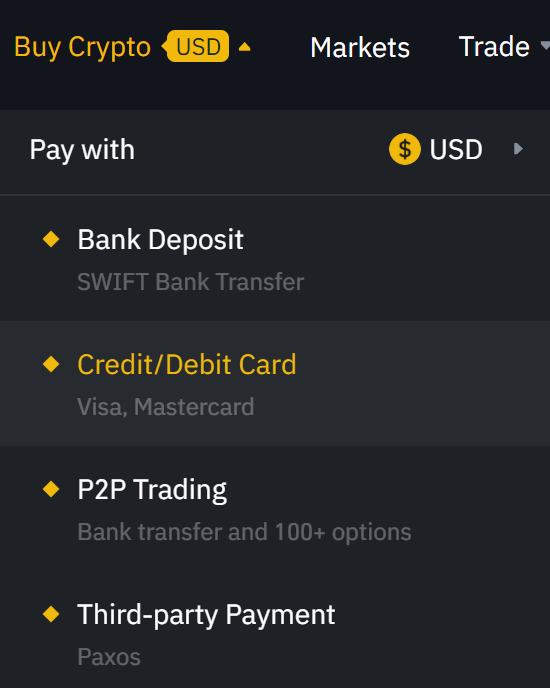
On the upper left corner, click on Buy Crypto, and select your payment method:
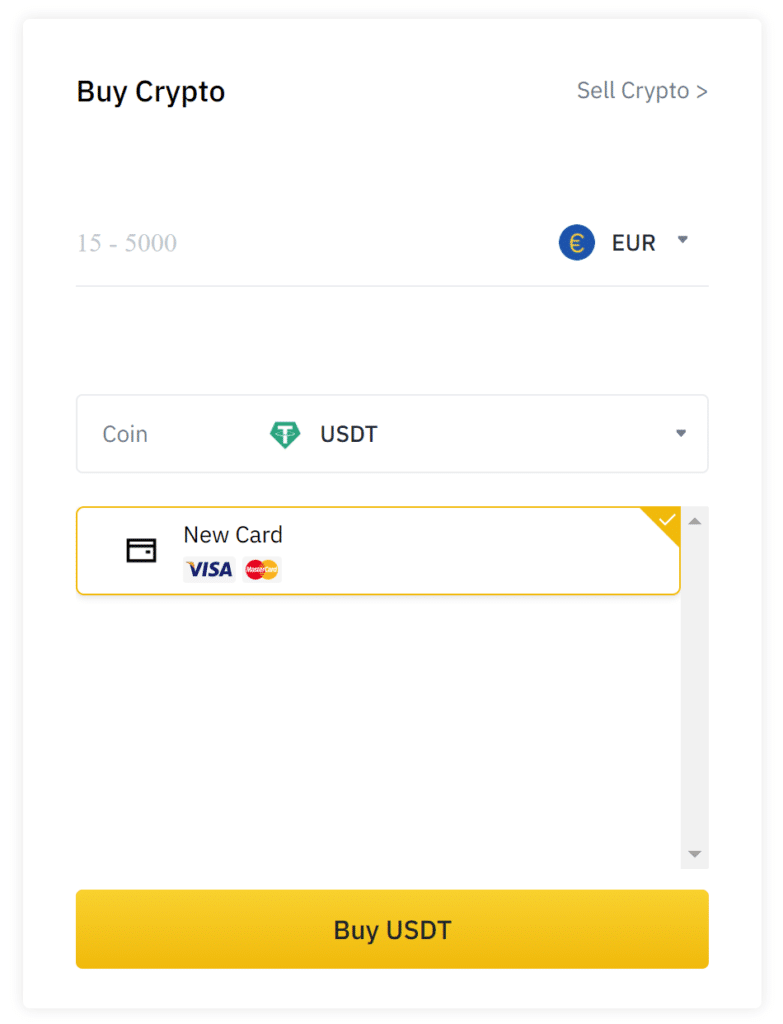
On the next page, select or add the card you’re going to use to buy crypto. And the cryptocurrency you’ll need to buy is USDT. The reason we are buying USDT is for the purpose of saving in fees. Buying USDT will have much lower fees than buying ETH directly because each USDT token represents one US dollar.
So we’ll be buying USDT, and trading it for ETH afterward. If you wanna skip this step you can buy ETH directly now, but I recommend you not to, so you can save on the fees and get more crypto out of your Fiat money.
Add your card if you haven’t yet, and proceed with the purchase of USDT.
Time to convert it to ETH. Click on Trade on the top menu:

Select the amount you want to trade (click on MAX if you want to trade it all). Proceed, wait for a few moments and you should now have ETH in your Binance Wallet. That’s it for this step.
Step 3 – Setting up a Metamask Wallet
Metamask is by far the most used walled in the world of Ethereum. Whenever you want to buy and sell cryptocurrencies or even use blockchain apps that run on the Ethereum Network, Metamask will be your best friend. Setting up the wallet is also very simple and easy.
Head over to metamask.io and click Download. You’ll need to use Google Chrome, Brave Browser, Firefox, or Microsoft Edge for this to work. So make sure you are using one of these four browsers. Now at the end of the page, click on the browser you’re using and install the extension.
You are now the Welcome Page of Metamask. Click on ‘Get Started.’ Now click on ‘Create a Wallet.’ Choose a strong password for your Metamask wallet and continue.
Very Important Part! Keeping your backup phrase safe is the difference between having millions in your account or be that guy on the landfill looking for his old hard drive.
Click on reveal your backup phrase and write every word down on paper. Make sure you don’t save your backup phrase on anything digital. This is for your security. After you wrote down your backup phrase, you’ll be asked to confirm it. Click on every word in the correct order, and you should be done.
Now since we are using the Arbitrum One, we’ll need to add the Network. I’ll go over this very quickly. Just go over to https://arbiscan.io/.
Bottom right corner click here:
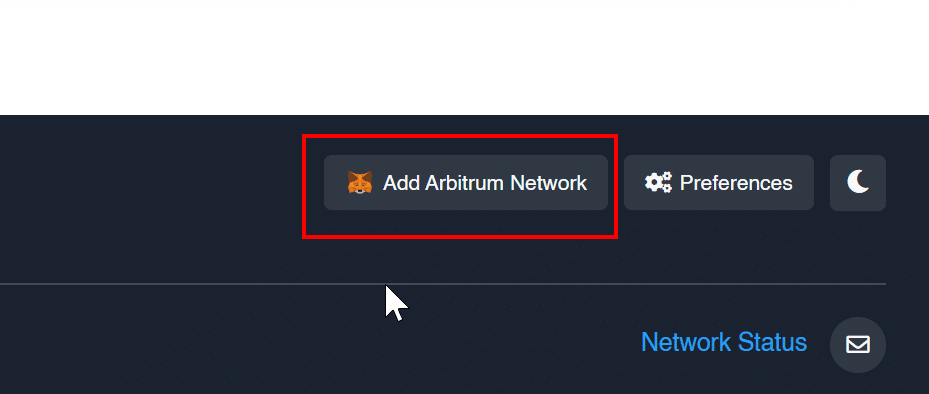
Accept everything on your Metamask and you should have your Arbitrum Network configurated and the network switched to it.
Alternatively you can add the network manually like this:
Click on the upper right corner where you see the image and then click Settings. Select Networks and click on Add Network.
Fill out the boxes with this info:
- Network Name: Arbitrum One
- New RPC URL: https://arb1.arbitrum.io/rpc
- Chain ID: 42161
- Symbol: AETH
- Block Explorer URL: https://arbiscan.io
Click Save, and now you have Arbitrum ONE installed on your Metamask.
Step 4 – Send your ETH to the Metamask Wallet
To buy MAGIC crypto, you’ll need to have some ETH in your Metamask balance so you can trade it for MAGIC. That is why I instructed you to buy ETH first, instead of Bitcoin, for example.
To have your previously purchased ETH on your Metamask wallet, you have to send it from your Binance account to your Metamask wallet.
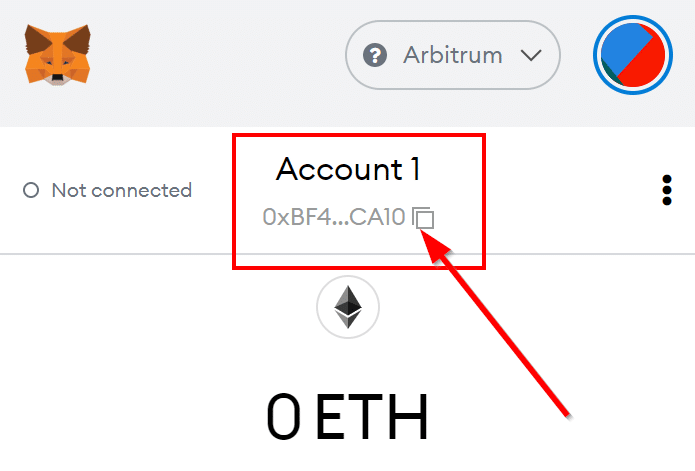
Copy your Metamask Wallet address by clicking here:
Go back to your Binance. On the upper right corner, click on Wallet – Fiat and Spot.

You should see a list of the cryptocurrencies in your wallet, find ETH and click withdraw:

Now you should paste the Metamask wallet address that you copied before to the Recipient’s ETH Address. Select the Arbitrum One network and choose the amount you want to send. This address is the same as the one you use with the Ethereum Network.
Confirm everything is correct and continue. Fill out the verification codes sent to your email, phone number or Google Authenticator and proceed. You should receive your ETH on your Metamask Wallet within minutes.
Step 5 – Buy MAGIC on SushiSwap with ETH

Before we head over to SushiSwap, we need to prepare your Metamask Wallet to receive MAGIC. Open Metamask, scroll all the way down, and click here:
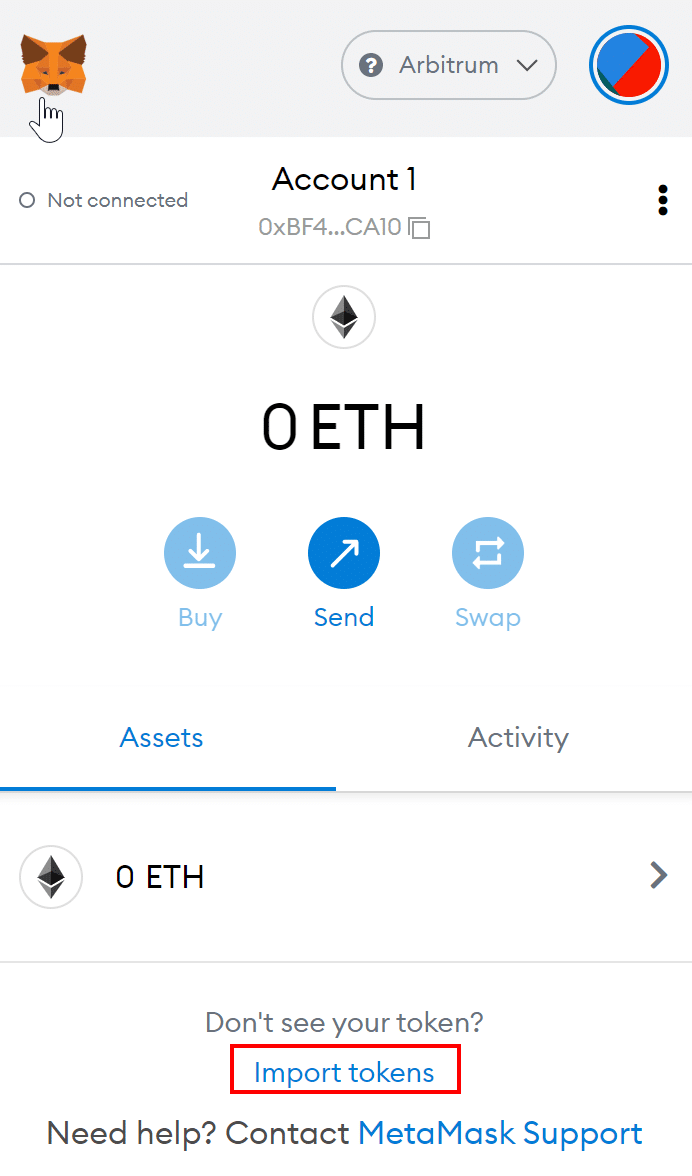
Select Custom Token and paste this token contract address there:
0x539bde0d7dbd336b79148aa742883198bbf60342
The rest should autofill, and you need to click next and then add tokens. Your account is now ready to receive MAGIC.
Let’s buy some MAGIC!
Go to Sushiswap. On the upper right corner, click on Connect Wallet and select Metamask. A confirmation popup should open on Metamask (click on the “little fox logo” if you don’t see it). Now you need to accept, connect, and your wallet should be connected to Sushiswap. You need to make sure you're connected to the Arbitrum version. Make sure your metamask says Arbitrum on the top.
Click on Select Token and paste this contract address: 0x539bde0d7dbd336b79148aa742883198bbf60342
Select it.
This is what you should see now:
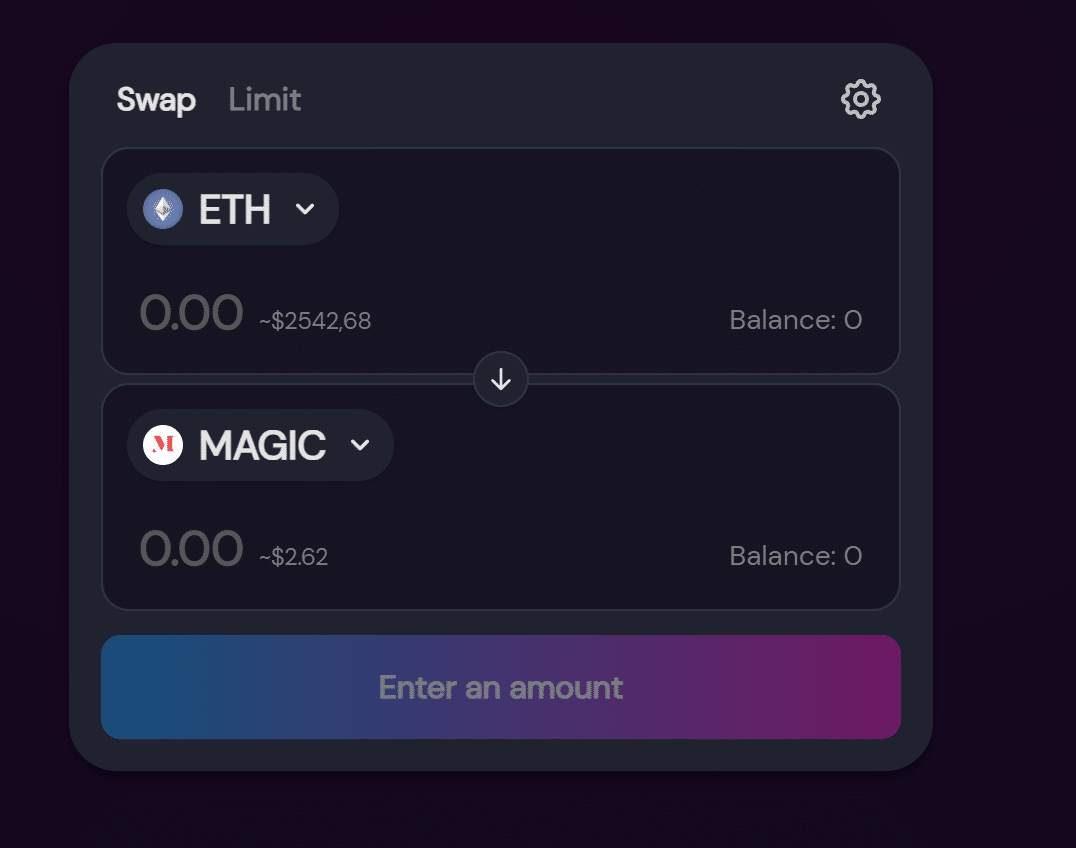
Now you have to select the amount of ETH you want to trade for MAGIC.
Click 'Swap', confirm the details, and confirm the transaction again on the Metamask popup.
Wait a few minutes, and your MAGIC should appear on your Metamask Wallet.
Congratulations! You are now a proud Investor of MAGIC!
Site: https://treasure.lol/
Discord: https://discord.gg/QRsaXs83eT
Twitter: https://twitter.com/Treasure_DAO
Please make sure you read our Disclaimer. We are not financial advisors.