How to Buy Cover Protocol Crypto (COVER)

What is Cover Protocol COVER?
According to Coingecko, Cover Protocol is : Cover Protocol is a peer-to-peer insurance market, where the way it operates is more similar to prediction market. Unlike other insurance protocols, the governance token is not used for underwriting risk. To bootstrap coverage for a new protocol, market makers will need to be incentivized to stake collateral of DAI/yDAI to mint CLAIM and NOCLAIM tokens. All series covers a specified protocol and have a specified expiry date. During the expiry date, either CLAIM or NOCLAIM will have the full claim to the collaterals. For example, if 100 DAI is used to provide coverage for Compound protocol until an expiry date, it will yield 100 CLAIM and 100 NOCLAIM tokens. On the expiry date, if there is a valid claim event, every CLAIM token will receive 1 DAI while NOCLAIM token will expire worthless. The converse is true if there is no valid claim event. In this case, every NOCLAIM token will receive 1 DAI while CLAIM token will expire worthless.
Where can I buy COVER Crypto?
You can buy Cover Protocol on Uniswap.
Why should you buy Cover Protocol?
Cover Protocol is really one of a kind project. The roadmap is incredibly promising and if the dev team can keep up with the with it, it's only a matter of time for the market to catch up. It's a very risky play but one that can yield amazing profits. Do you own diligence and research the project further so you can make your own decision.

How to Buy Cover Protocol Crypto?
Step 1 - Setting up a Metamask Wallet
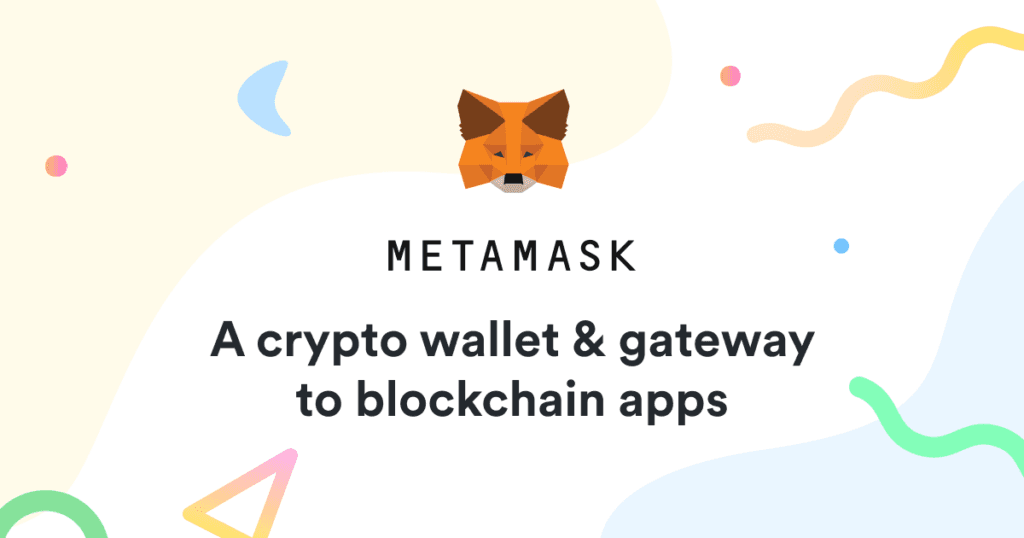
Metamask is by far the most used walled in the world of Ethereum. Whenever you want to buy and sell cryptocurrencies or even use blockchain apps that run on the Ethereum Network, Metamask will be your best friend. Setting up the wallet is also very simple and easy.
Head over to metamask.io and click Download. You'll need to use Google Chrome, Brave Browser, Firefox, or Microsoft Edge for this to work. So make sure you are using one of these four browsers. Now at the end of the page, click on the browser you're using and install the extension.You are now the Welcome Page of Metamask. Click on 'Get Started.' Now click on 'Create a Wallet.' Choose a strong password for your Metamask wallet and continue.
Very Important Part! Keeping your backup phrase safe is the difference between having millions in your account or be that guy on the landfill looking for his old hard drive.
Click on reveal your backup phrase and write every word down on paper. Make sure you don't save your backup phrase on anything digital. This is for your security. After you wrote down your backup phrase, you'll be asked to confirm it. Click on every word in the correct order, and you should be done.
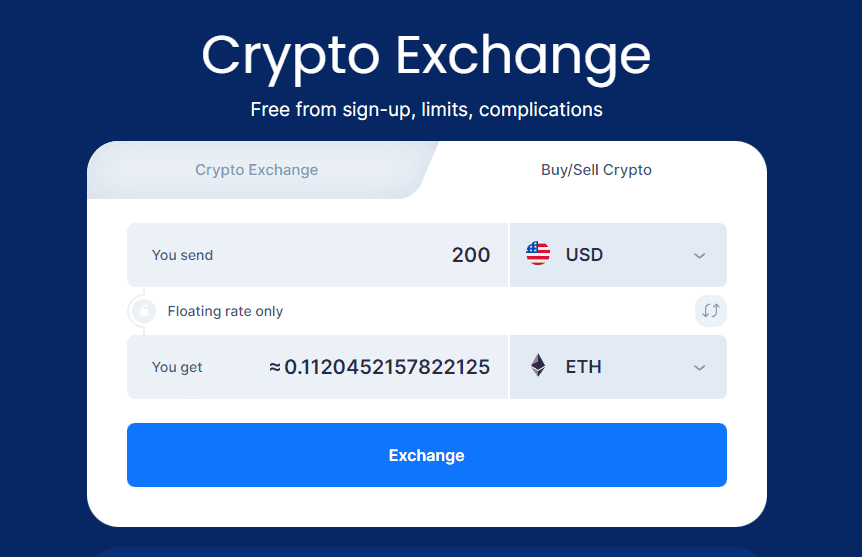
Step 2 - Buy Ethereum on Simpleswap
Simpleswap is the easiest way to buy crypto today. Free from registrations, KYC and third-party custody. With Simpleswap we can buy ETH and receive it directly on our on-chain Metamask wallet, skipping most of the steps we'd have to take through a traditional exchange.
Click here to access Simpleswap
Just click the Buy/Sell Crypto tab, insert the USD amount you want to trade for ETH, and click "Exchange", just like this:
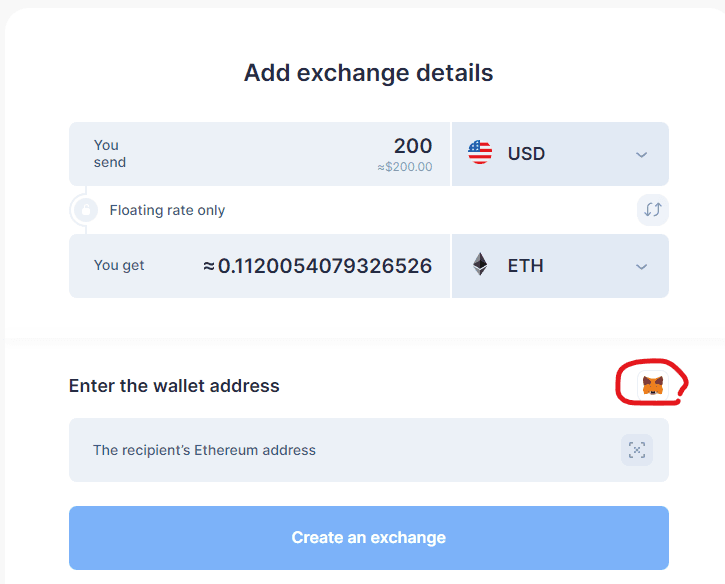
Now all you have to do is click the Metamask fox logo to directly copy and paste your Metamask Ethereum address. It should add it automatically.
You can now choose between Google Pay or card to complete the payment:
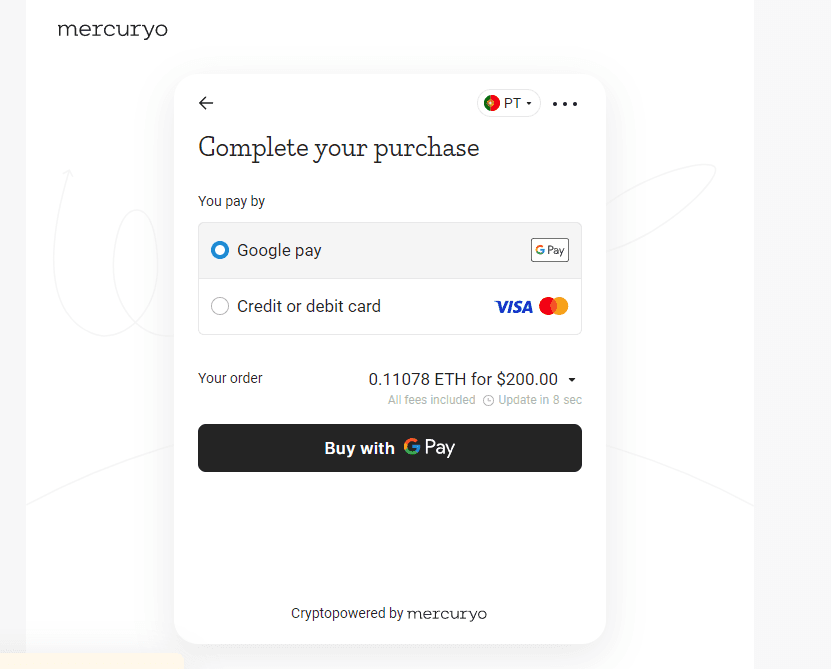
Once you complete the payment, all you gotta do is wait a few minutes for the payment confirmation, and for the on-chain transaction to complete. Once all that is completed you should see your updated balance in Metamask.
Step 3 - Buy Cover Protocol on Uniswap with ETH
Uniswap is currently the number one Decentralized Exchanged in the world, and it's simply the best place to buy cryptocurrencies that aren't available on sites like Coinbase or Binance.
Before we head over to Uniswap, we need to prepare your Metamask Wallet to receive Cover Protocol. Open Metamask, scroll all the way down, and click here:
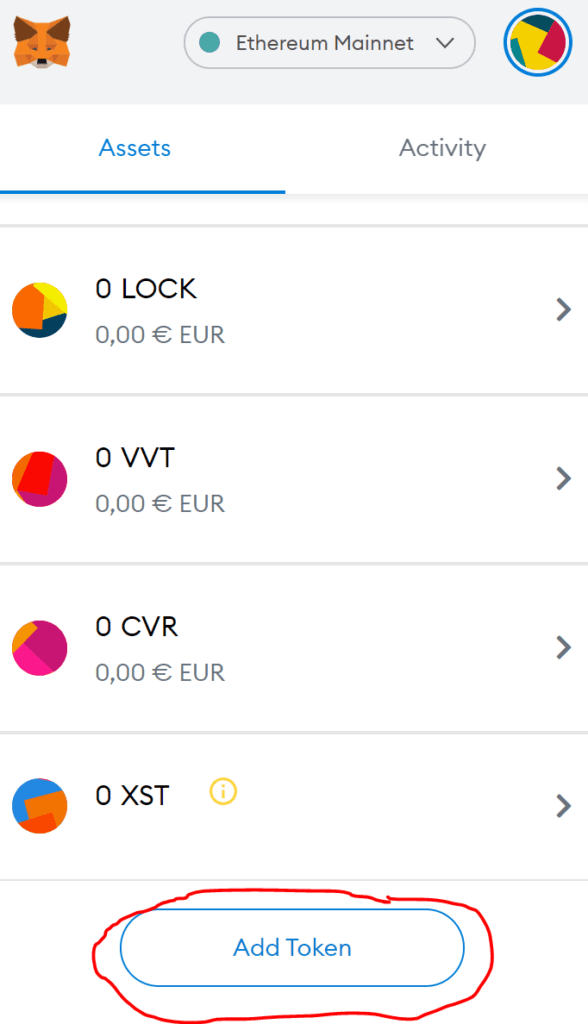
Select Custom Token and paste this token contract address there:
0x4688a8b1f292fdab17e9a90c8bc379dc1dbd8713
The rest should autofill, and you need to click next and then add tokens. Your account is now ready to receive Cover Protocol (COVER).
You can check the price and confirm the correct token address of Cover Protocol on Coingecko.
Let's buy some Cover Protocol!
Go to Uniswap. On the upper right corner, click on Connect Wallet and select Metamask. A confirmation popup should open on Metamask (click on the "little fox logo" if you don't see it). Now you need to accept, connect, and your wallet should be connected to Uniswap.
Select a token and paste the Token contract address: 0x4688a8b1f292fdab17e9a90c8bc379dc1dbd8713
Click Import and accept the terms.
Now you have to select the amount of ETH you want to trade for COVER. After you confirm it, another popup will appear from the Metamask extension and you should approve the transaction.
Wait a few minutes, and your COVER should appear on your Metamask Wallet.
Congratulations! You are now a proud Investor of Cover Protocol!
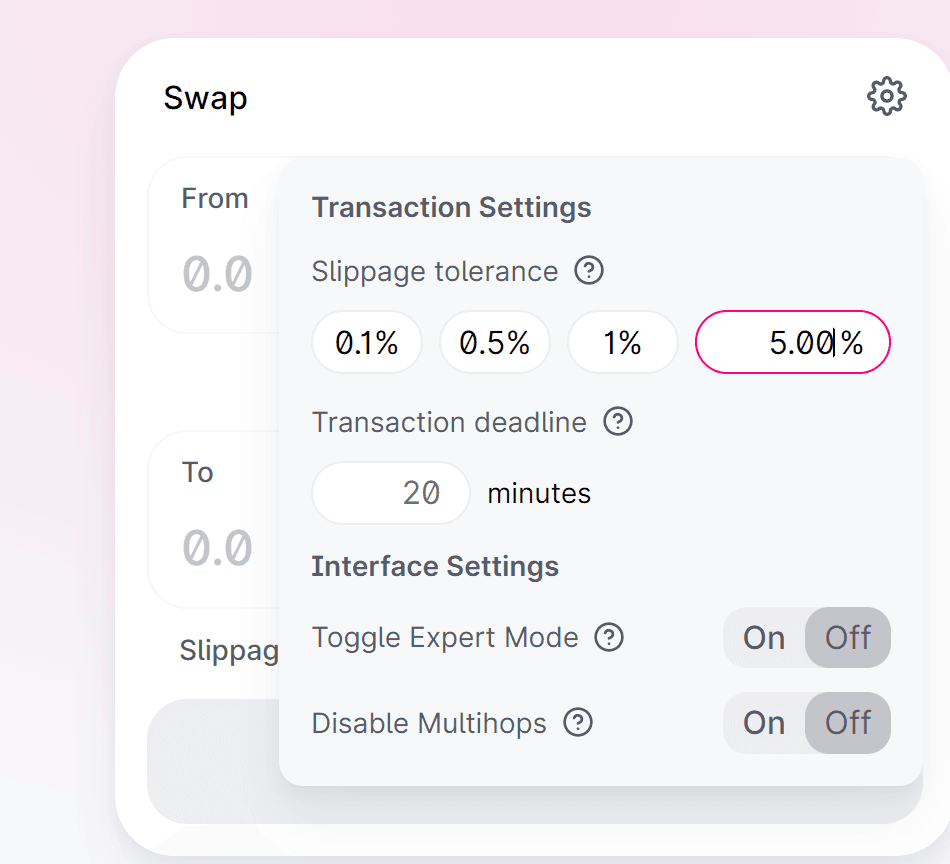
In case your transactions keep on failing, adjust your slippage tolerance. To do that, click on Uniswap's gear icon, and put 5% here:
Step 4 - Store Cover Protocol on Ledger
Check out our guide on how you can store Cover Protocol on Ledger's Hardware Wallet
Check out Cover Protocol links:
Please make sure you read our Disclaimer. We are not financial advisors.