How to Buy Pige Inu Crypto (PINU)

What is Pige Inu Crypto?
According to Coingecko, Pige Inu is : Pige Inu is a community-driven meme cryptocurrency on Binance Smart Chain. Our contract is fully renounced, we have low tax on buys and sells. At Pige Inu, we are exceptionally proud of the community that is being built surrounding our token. We work to provide engagement through our social media pages, as well as timely announcements, and transparency as the company develops.
Where can I buy PINU Crypto?
You can buy Pige Inu on PancakeSwap.
Why should you buy Pige Inu?
Binance Smart Chain has been gaining a lot of traction lately. The main motivation for this is the very low fees that it offers. Ethereum gas fees are way beyond acceptable. I've seen transaction fees of 100$+ in Uniswap, and nobody wants to pay that. Ethereum 2.0 has been in the works for years now, and there is still no solution for these absurd gas fees on the Ethereum Network.
Pige Inu is amongst the best projects on BSC.The roadmap is incredibly promising and if the dev team can keep up with the with it, it's only a matter of time for the market to catch up. It's a very risky play but one that can yield amazing profits. Do you own diligence and research the project further so you can make your own decision.
How to Buy Pige Inu Crypto?

Step 1 - Setting up a Metamask Wallet
Metamask is by far the most used walled in the world of Ethereum. Whenever you want to buy and sell cryptocurrencies or even use blockchain apps that run on the Ethereum Network, Metamask will be your best friend. Setting up the wallet is also very simple and easy.
Head over to metamask.io and click Download. You'll need to use Google Chrome, Brave Browser, Firefox, or Microsoft Edge for this to work. So make sure you are using one of these four browsers. Now at the end of the page, click on the browser you're using and install the extension.
You are now the Welcome Page of Metamask. Click on 'Get Started.' Now click on 'Create a Wallet.' Choose a strong password for your Metamask wallet and continue.
Very Important Part! Keeping your backup phrase safe is the difference between having millions in your account or be that guy on the landfill looking for his old hard drive.
Click on reveal your backup phrase and write every word down on paper. Make sure you don't save your backup phrase on anything digital. This is for your security. After you wrote down your backup phrase, you'll be asked to confirm it. Click on every word in the correct order, and you should be done.
Now since we are using the Binance Smart Chain, we'll need to add the Network. I'll go over this very quickly. If you need a more in-depth tutorial for this part, you can check out Binance's tutorial right here.
Click on the upper right corner where you see the image and then click Settings. Select Networks and click on Add Network.
Fill out the boxes with this info:
Network Name: Smart Chain
New RPC URL: https://bsc-dataseed.binance.org/
ChainID: 56
Symbol: BNB
Block Explorer URL: https://bscscan.com
Click Save, and now you have Binance Smart Chain installed on your Metamask.
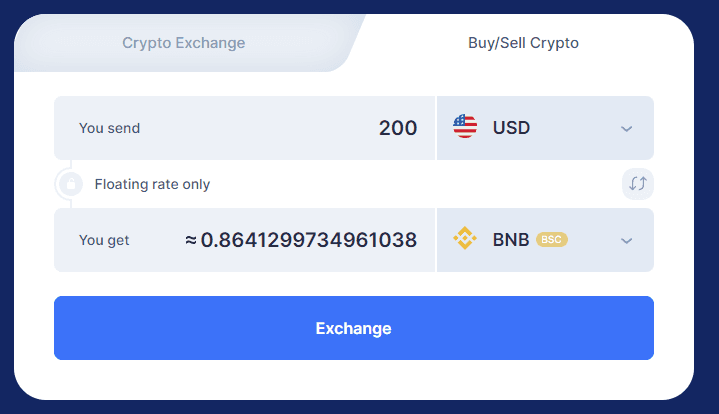
Step 2 - Buy BNB on Simpleswap
Simpleswap is the easiest way to buy crypto today. Free from registrations, KYC and third-party custody. With Simpleswap we can buy BNB and receive it directly on our on-chain Metamask wallet, skipping most of the steps we'd have to take through a traditional exchange.
Click here to access Simpleswap
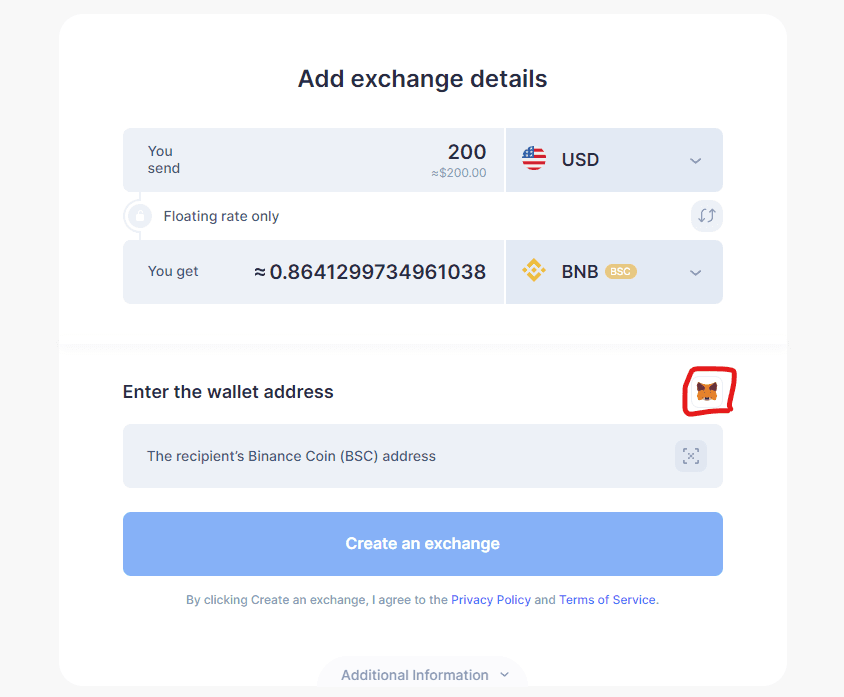
Just click the Buy/Sell Crypto tab, insert the USD amount you want to trade for BNB, and click "Exchange", just like this:
Now all you have to do is click the Metamask fox logo to directly copy and paste your Metamask BNB address. It should add it automatically.
You can now choose between Google Pay or card to complete the payment:
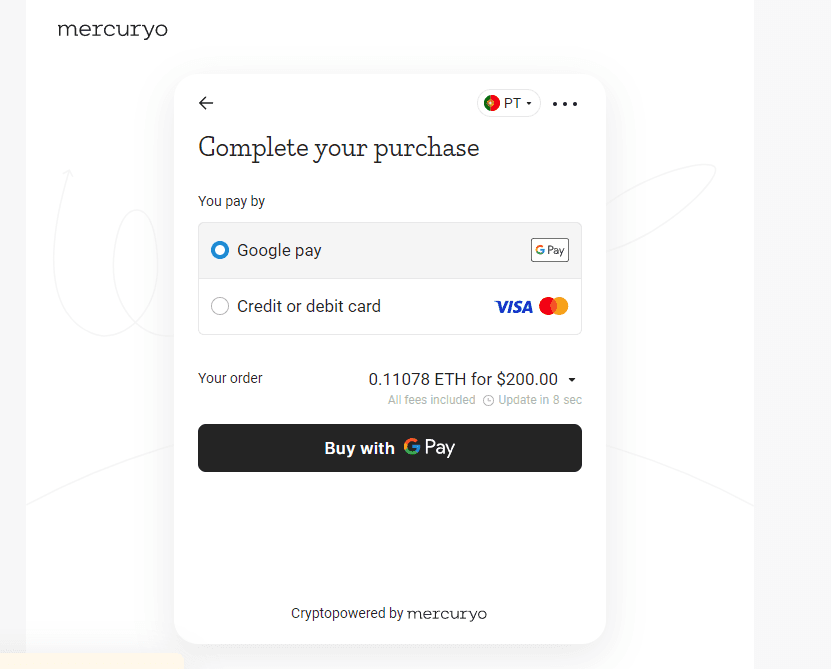
Once you complete the payment, all you gotta do is wait a few minutes for the payment confirmation, and for the on-chain transaction to complete. Once all that is completed you should see your updated balance in Metamask.

Step 3 - Buy Pige Inu on PancakeSwap with BNB
Before we head over to PancakeSwap, we need to prepare your Metamask Wallet to receive PINU. Open Metamask, scroll all the way down, and click here:
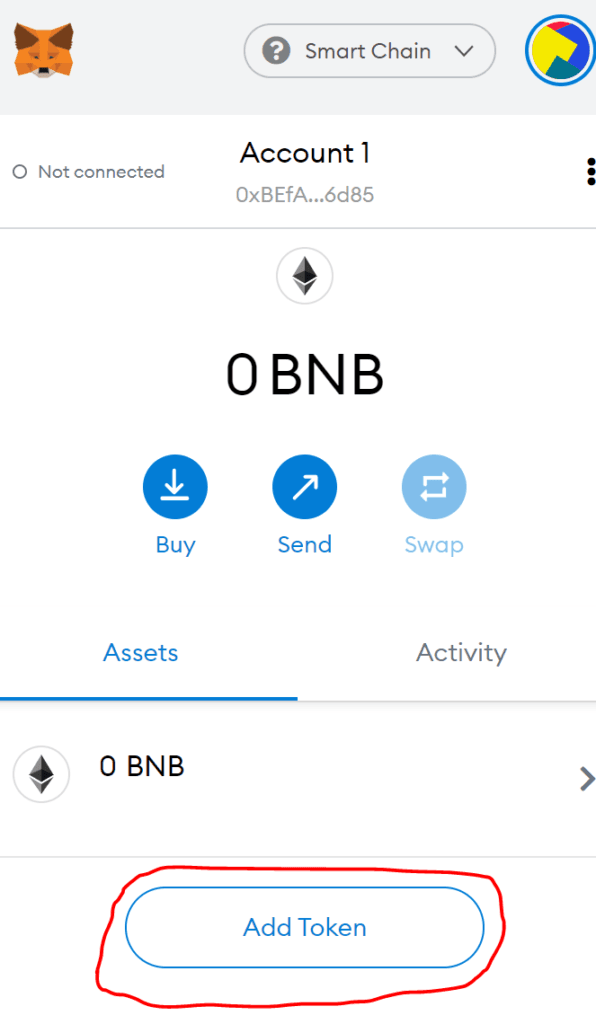
Select Custom Token and paste this token contract address there:
0x1fdb2c3851d067502ce2122be80a41ea212949e2
The rest should autofill, and you need to click next and then add tokens. Your account is now ready to receive PINU.
You can check the price of Pige Inu, and confirm the Token Contract address on Coingecko.
Let's buy some PINU!
Go to Pancakeswap. On the upper right corner, click on Connect Wallet and select Metamask. A confirmation popup should open on Metamask (click on the "little fox logo" if you don't see it). Now you need to accept, connect, and your wallet should be connected to Pancakeswap.
Click on Select Token and paste this contract address: 0x1fdb2c3851d067502ce2122be80a41ea212949e2
Select it.
Now you have to select the amount of BNB you want to trade for PINU. After you confirm it, another popup will appear from the Metamask extension and you should approve the transaction.
Wait a few minutes, and your PINU should appear on your Metamask Wallet.
Congratulations! You are now a proud Investor of Pige Inu!
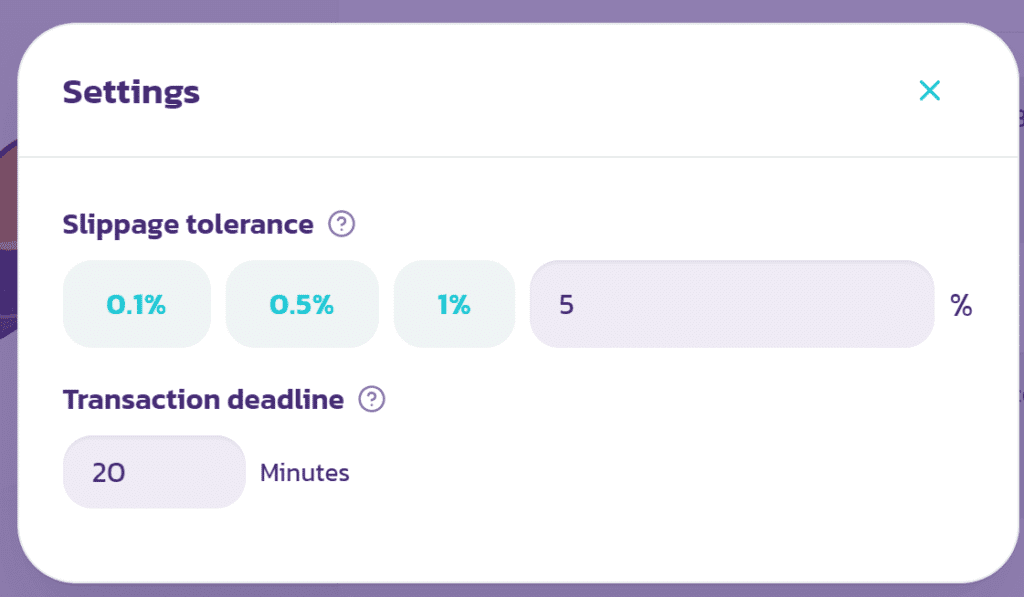
In case your transactions keep on failing, adjust your slippage tolerance. To do that, click on Pancakeswap's gear icon, and put 5% here:
Check out Pige Inu links:
Website: https://pigeinu.io/
Twitter: https://twitter.com/PigeInu
Telegram: https://t.me/pigeinu
Explorer: https://bscscan.com/token/0x995c0e3b9af4da89fc76c5c0784e97c7a36eec06